AWB Extraction for Samsung devices
So you want to make an AWB profile for your device, and don't have root access? (if you do, skip to Part 2).
Prerequisites:
Python 3.x (added to path)
Credit for figuring out all of this goes to Savitar! Couldn't have done it without him.
Part 1: Getting the bin files
First, get the model number and CSC (region code) of the device you want to pull AWB information from.
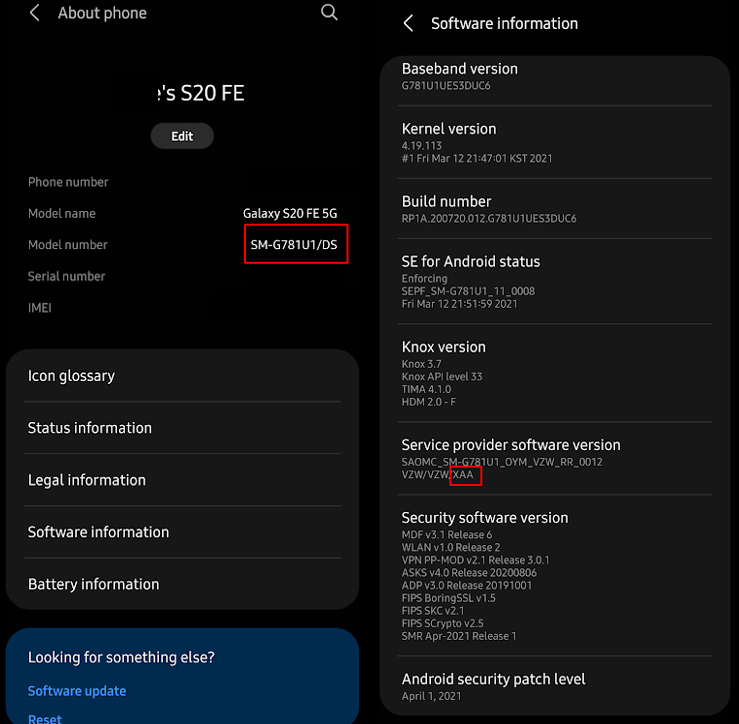
Once you have this, open a cmd window on your device and type the following command (you can paste in the command prompt by right clicking):
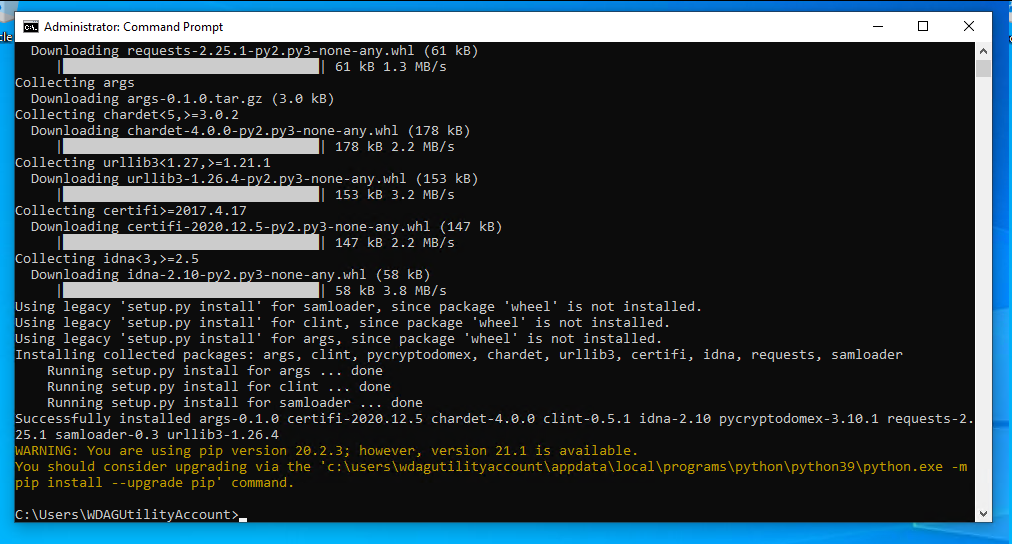
pip3 install git+https://github.com/nlscc/samloader.git
If your prerequisites are setup correctly, you should see this screen:
Now, extract the AWB_tutorial_morgenman.zip folder, and navigate to it in command line using:
cd C:\<PATHtoEXTRACTEDfolder>\
Now, run this command, filling in the model and csc code (be sure to use all caps, and model number should start with SM-) :
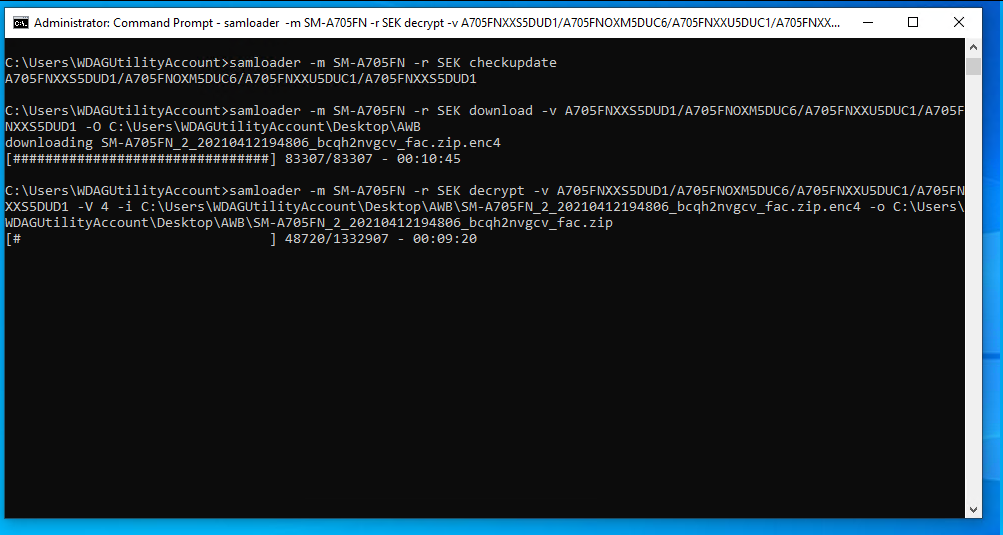
samloader -m <model> -r <region> checkupdate
Your output should look like this:
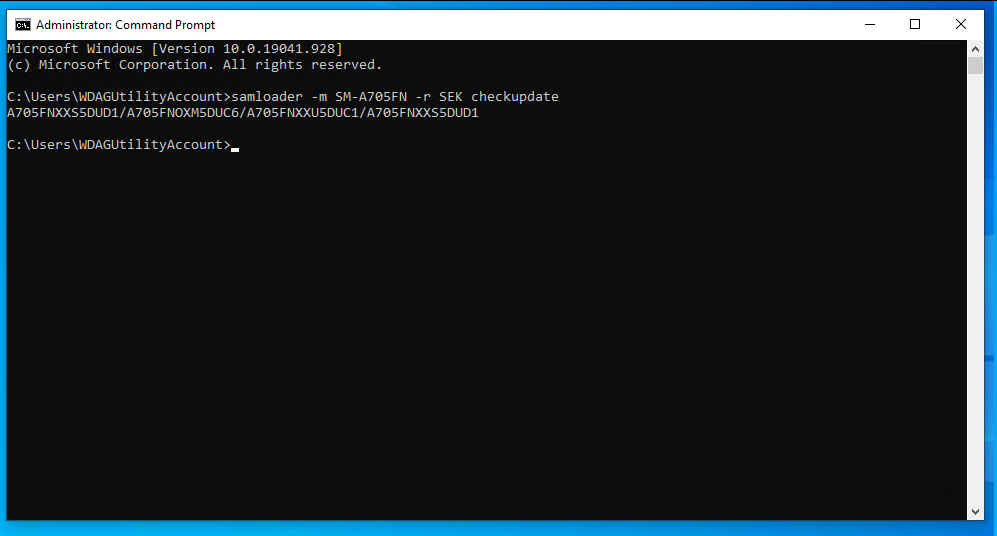
Keep track of this number. From now on, I will refer to it as <updatenumber> and the entire thing should be substituted in.
samloader -m <model> -r <region> download -v <updatenumber> -O ./
Be sure that the -O is capitalized. It will save it in whatever folder the command line is in. You can change this by replacing the ./ with a folder path. In the following example, it's stored on the desktop in a folder called AWB.
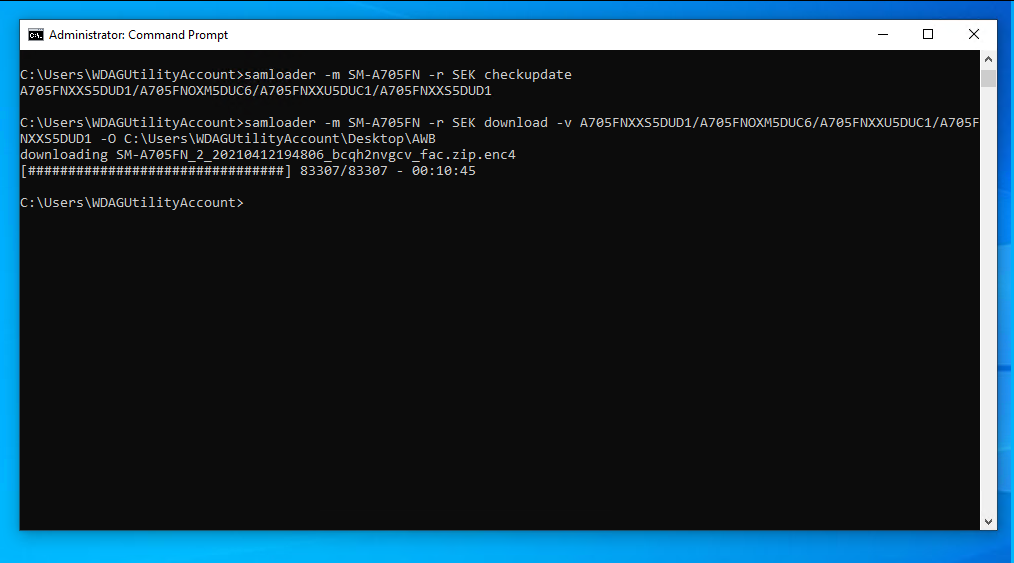
Look at the output above. you'll notice the file saved ends in .enc4. This means the encryption version is 4.
Run the following command, filling in the encryption version:
samloader -m <model> -r <region> decrypt -v <updatenumber> -V <enc-version> -i <input-file> -o <output-file>
When typing in the input file and output file, simply get to the correct directory and hit tab to fill in the filename. Be sure to make sure the output file ends in .zip. If successful, it will look like this:
When done, extract the largest file. It should have "OS" in the title:
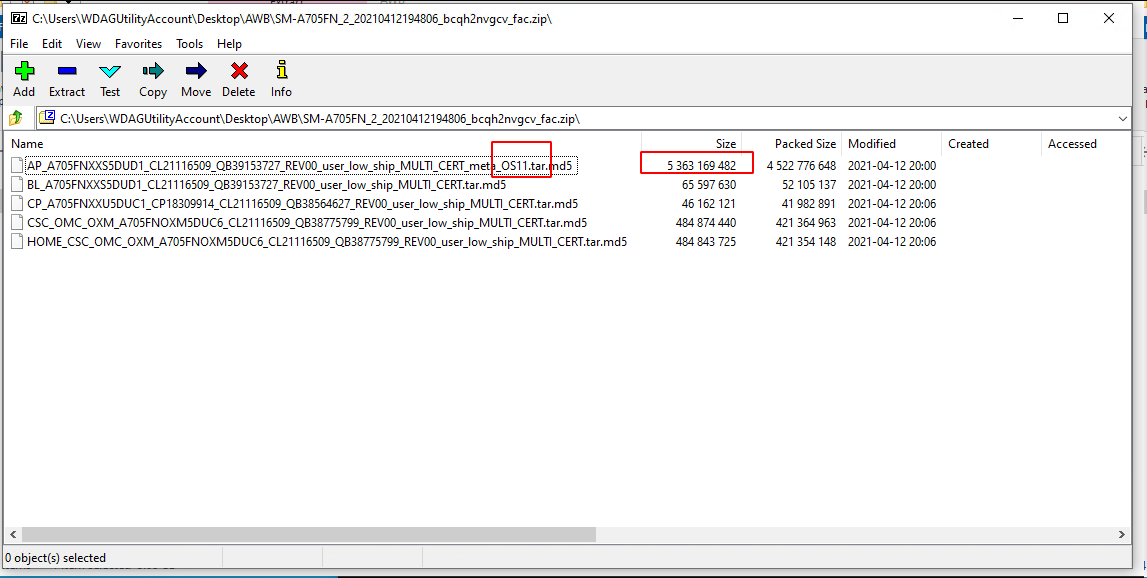
Rename the file from .tar.md5 to .tar, and extract the largest file in that. It should be labeled super.img.lz4 or vendor.img.ext4.lz4
Place the extracted file into the directory named "lz4". Then drag it onto the program lz4.exe
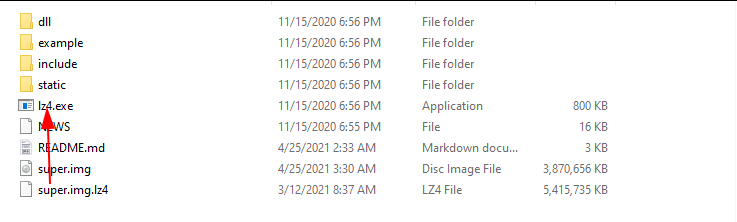
If you now have a vendor.img.ext4 file (rather than a super.img file), move it to the jb directory, and click run me.
You should have a file in the current directory ending in '.img' now.
If this file is named vendor.img, skip to part 2.
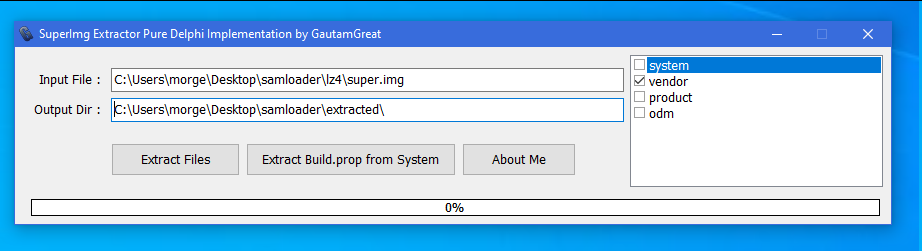
If this file was super.img, open SuperImg_Unpacker.exe. Double click on input file, and choose the .img file you just generated. Select vendor, and click extract files. You should have a file named 'vendor.img'
Part 2: vendor.img
If you have root access and were sent here, pull any files in /vendor/lib64/camera/ with the word 'tuned' in them to your computer and move to part 3.
Open the included program Ext2explore. Ignore any warnings about admin access. Open your vendor.img file:
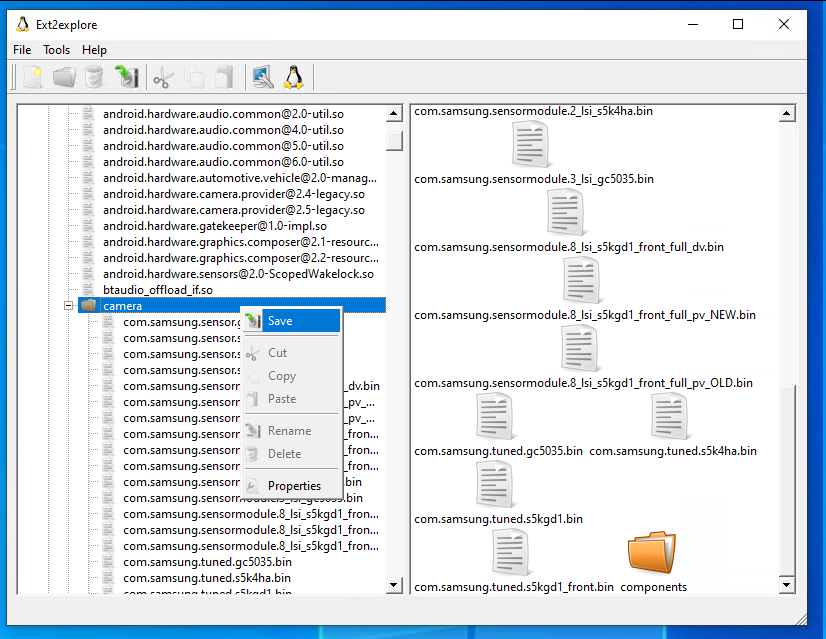
You are going to want to navigate to /lib64/camera. Right click on the camera folder and click 'save'
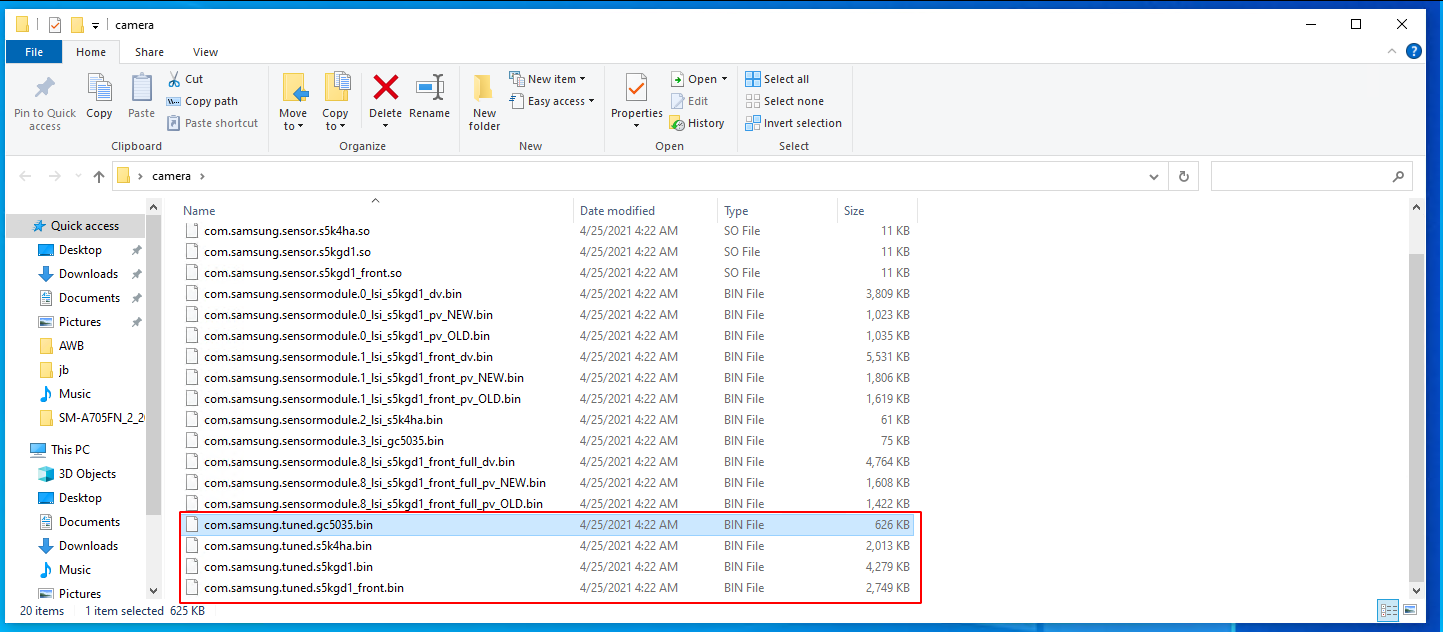
In that folder, you should have several bin files, with a handful saying 'tuned'.
Congratulations, you have extracted the bin files successfully!
Part 3: bin file to AWB profile
At this point, you should have an idea of what sensor you wish to do first, and it's name. We are going to do the first file in this folder ^.
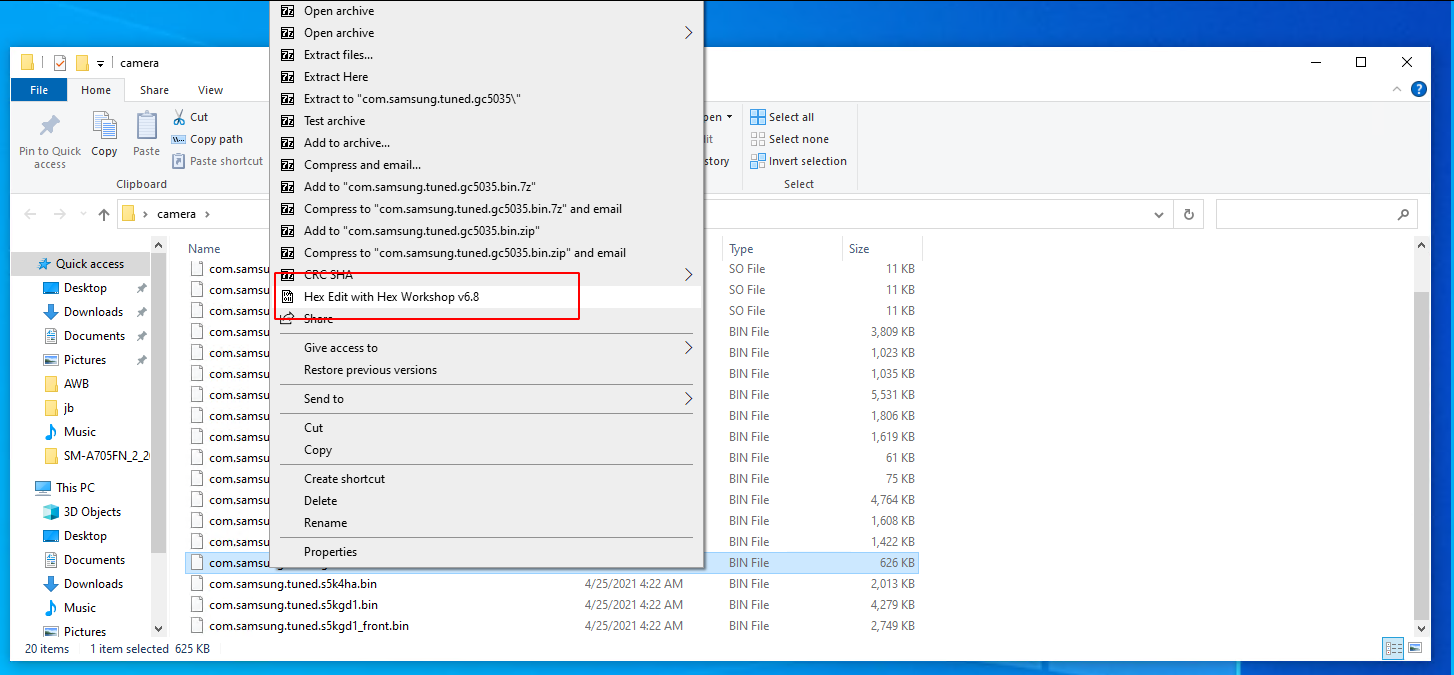
Open the file in Hex Workshop Hex Editor.
Once open, drag the barrier between the hex code and the Data Instructor so only 14 Columns are visible.

Now, I have found an easier way to find the awb values without going through a ton of steps, which we are going to try here. If this works, we will skip to part 4:
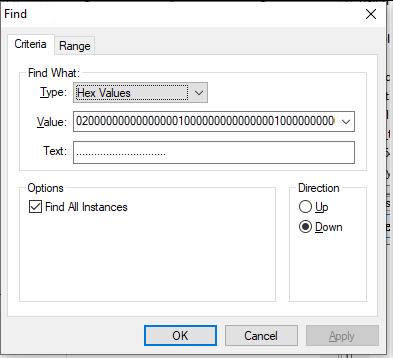
Press ctrl + f and change the search type to Hex Values. Check the box saying find all occurrences. Put
020000000000000001000000000000000100000000000000000000000000
in the value box and search:
Look at the bottom right corner. There should be a bunch of results to your search. Click on each one (probably the last one), and see if the data following the string you looked for is neatly organized into four pair chunks of information, as seen below.
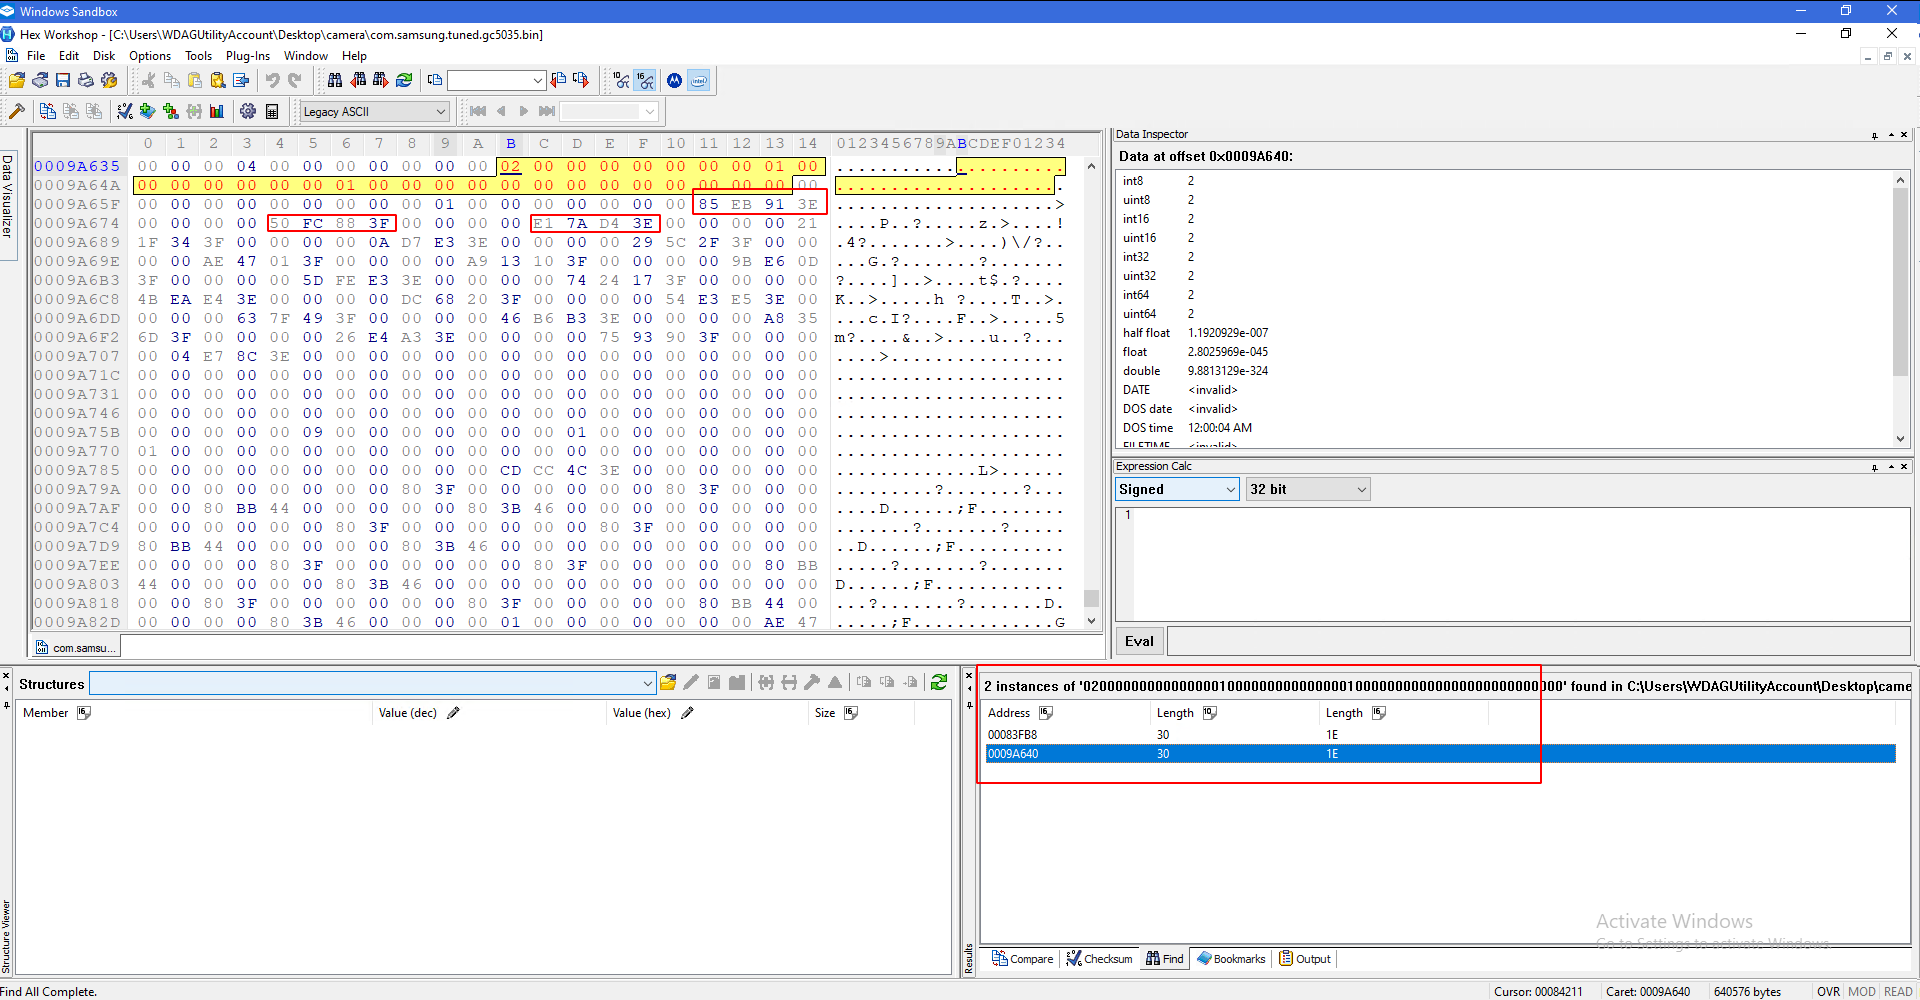
There should be only one result that matches this. If this is true, skip to part 4!
Otherwise, scroll back to the top and continue.
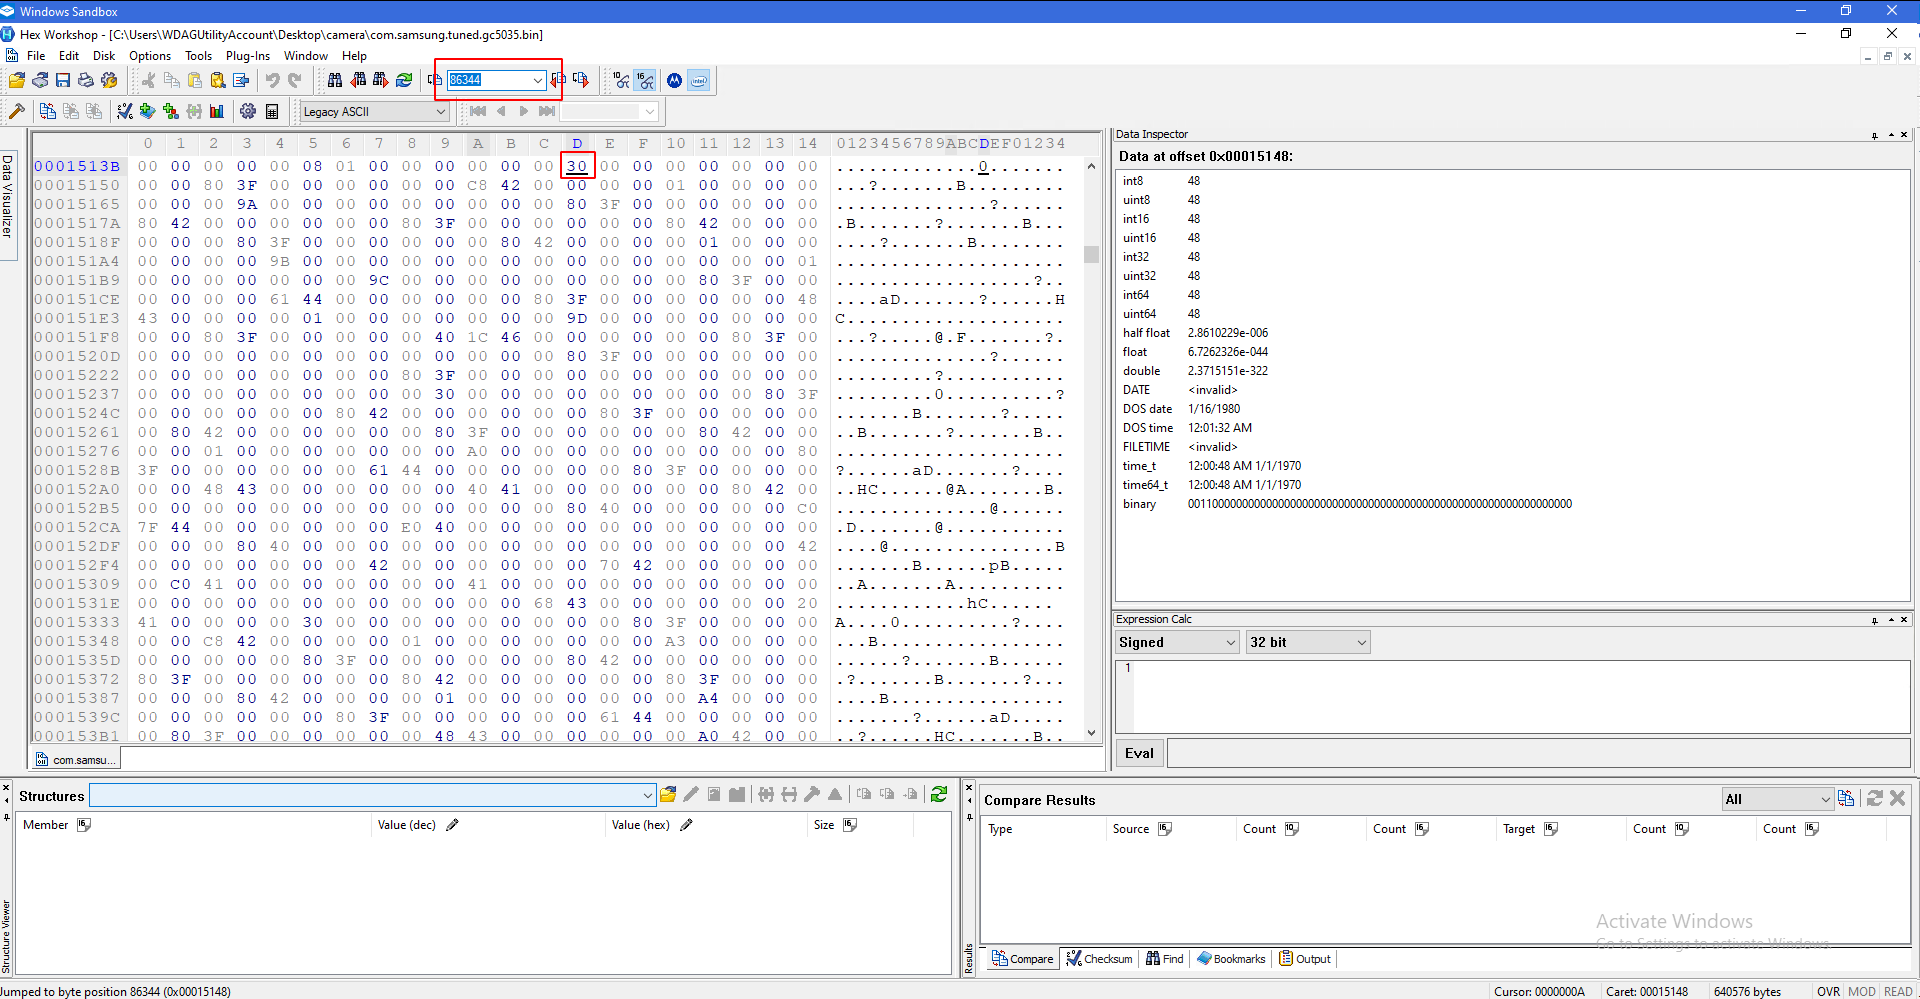
Make sure you can only see 14 columns.
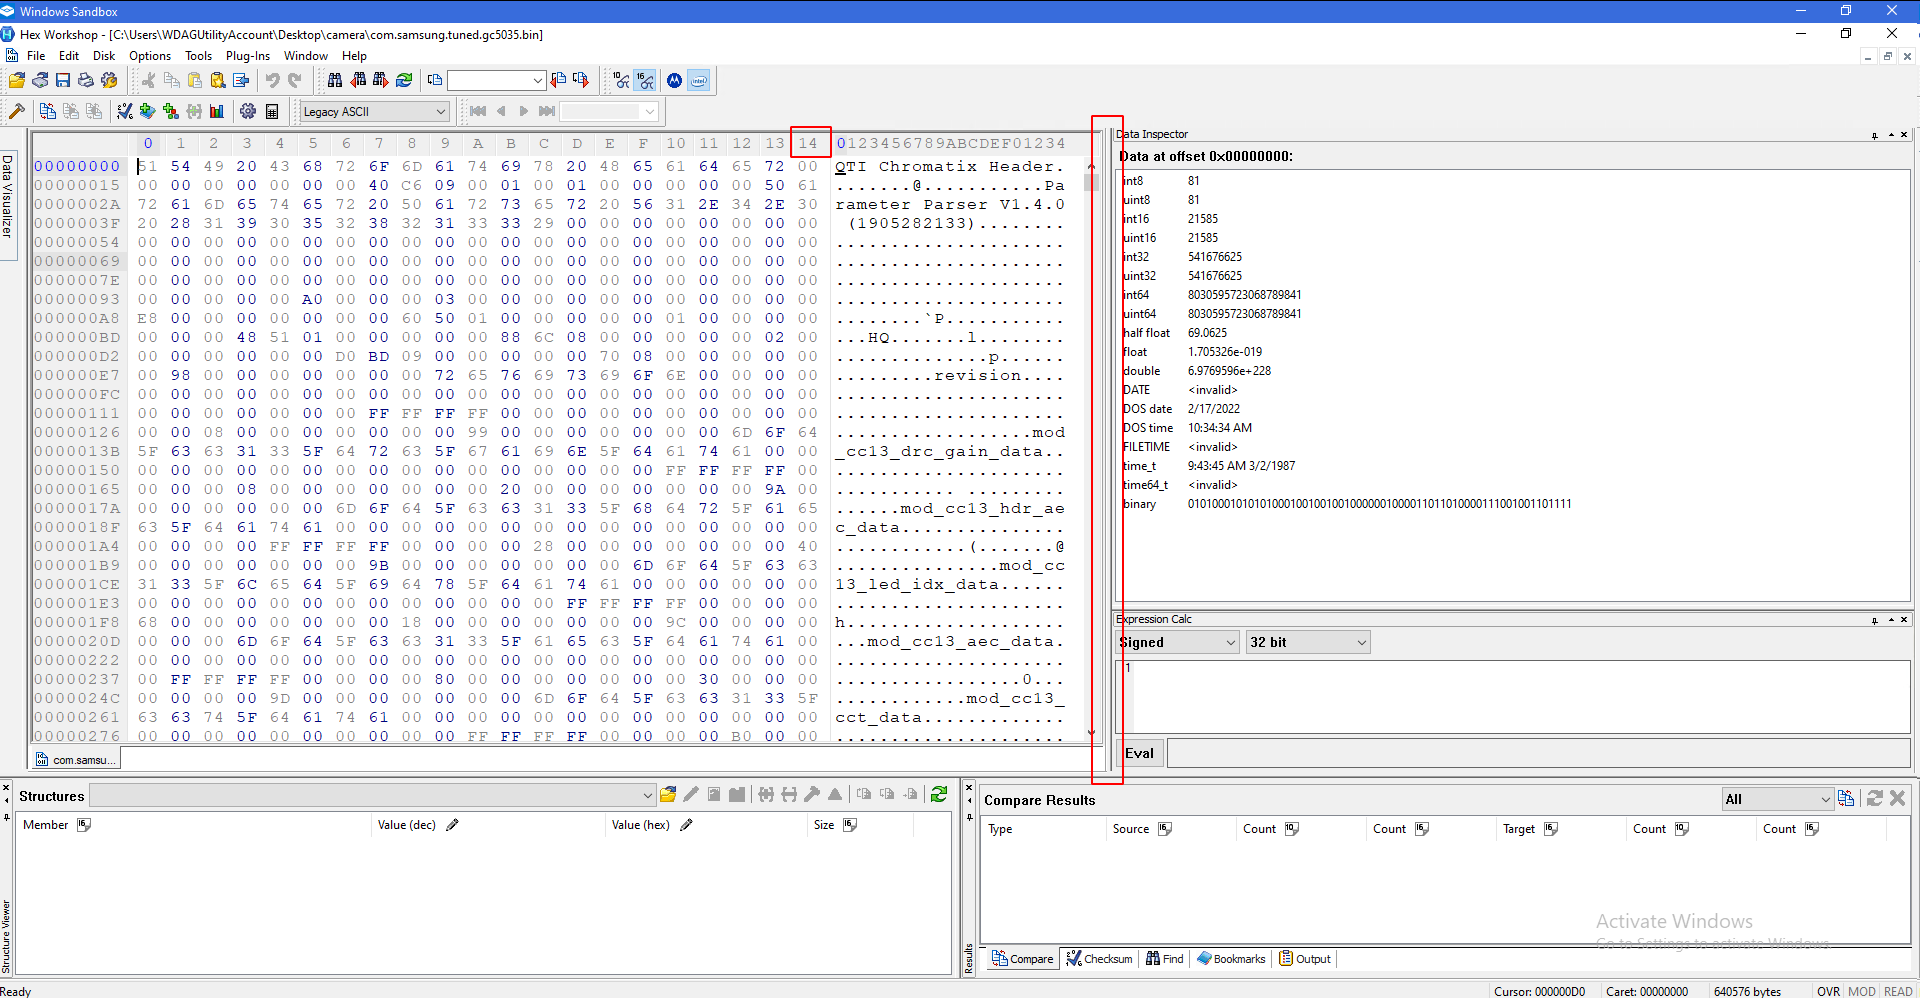
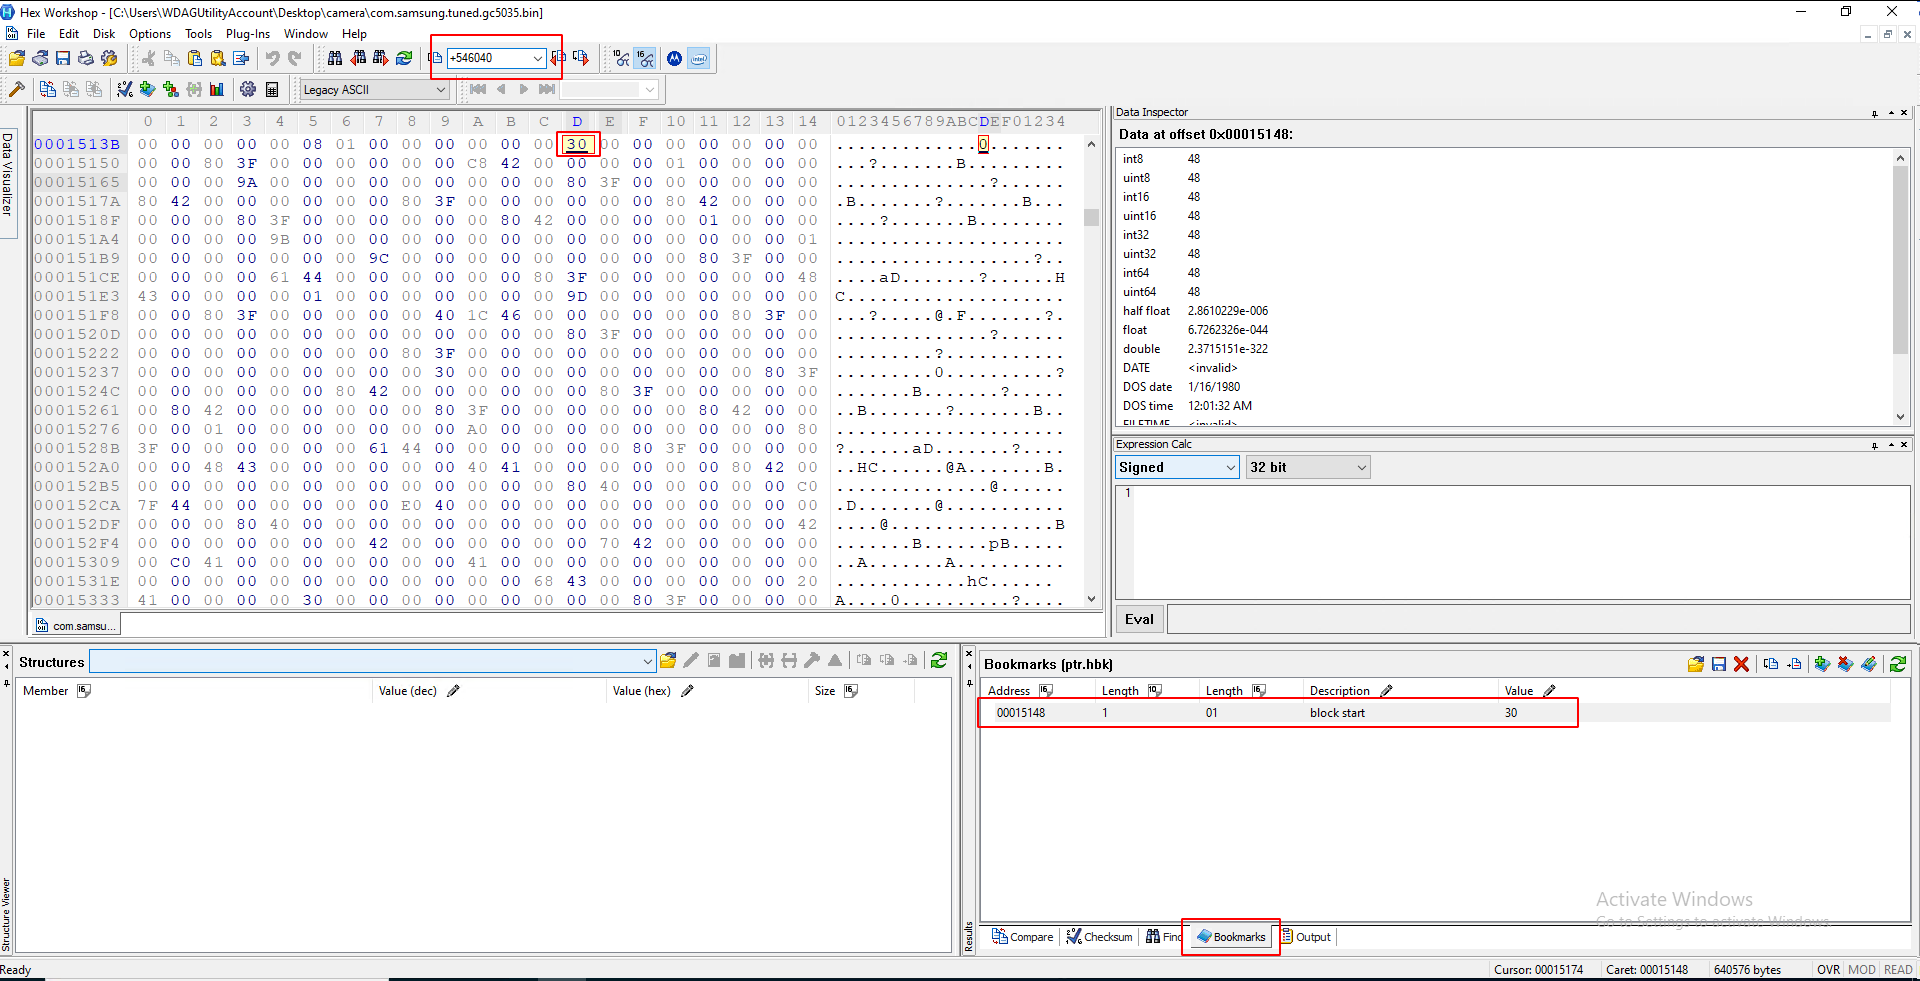
Look at the line ending in BD. You should see three pairs of data, followed by five zeros, followed by some other amount of data:
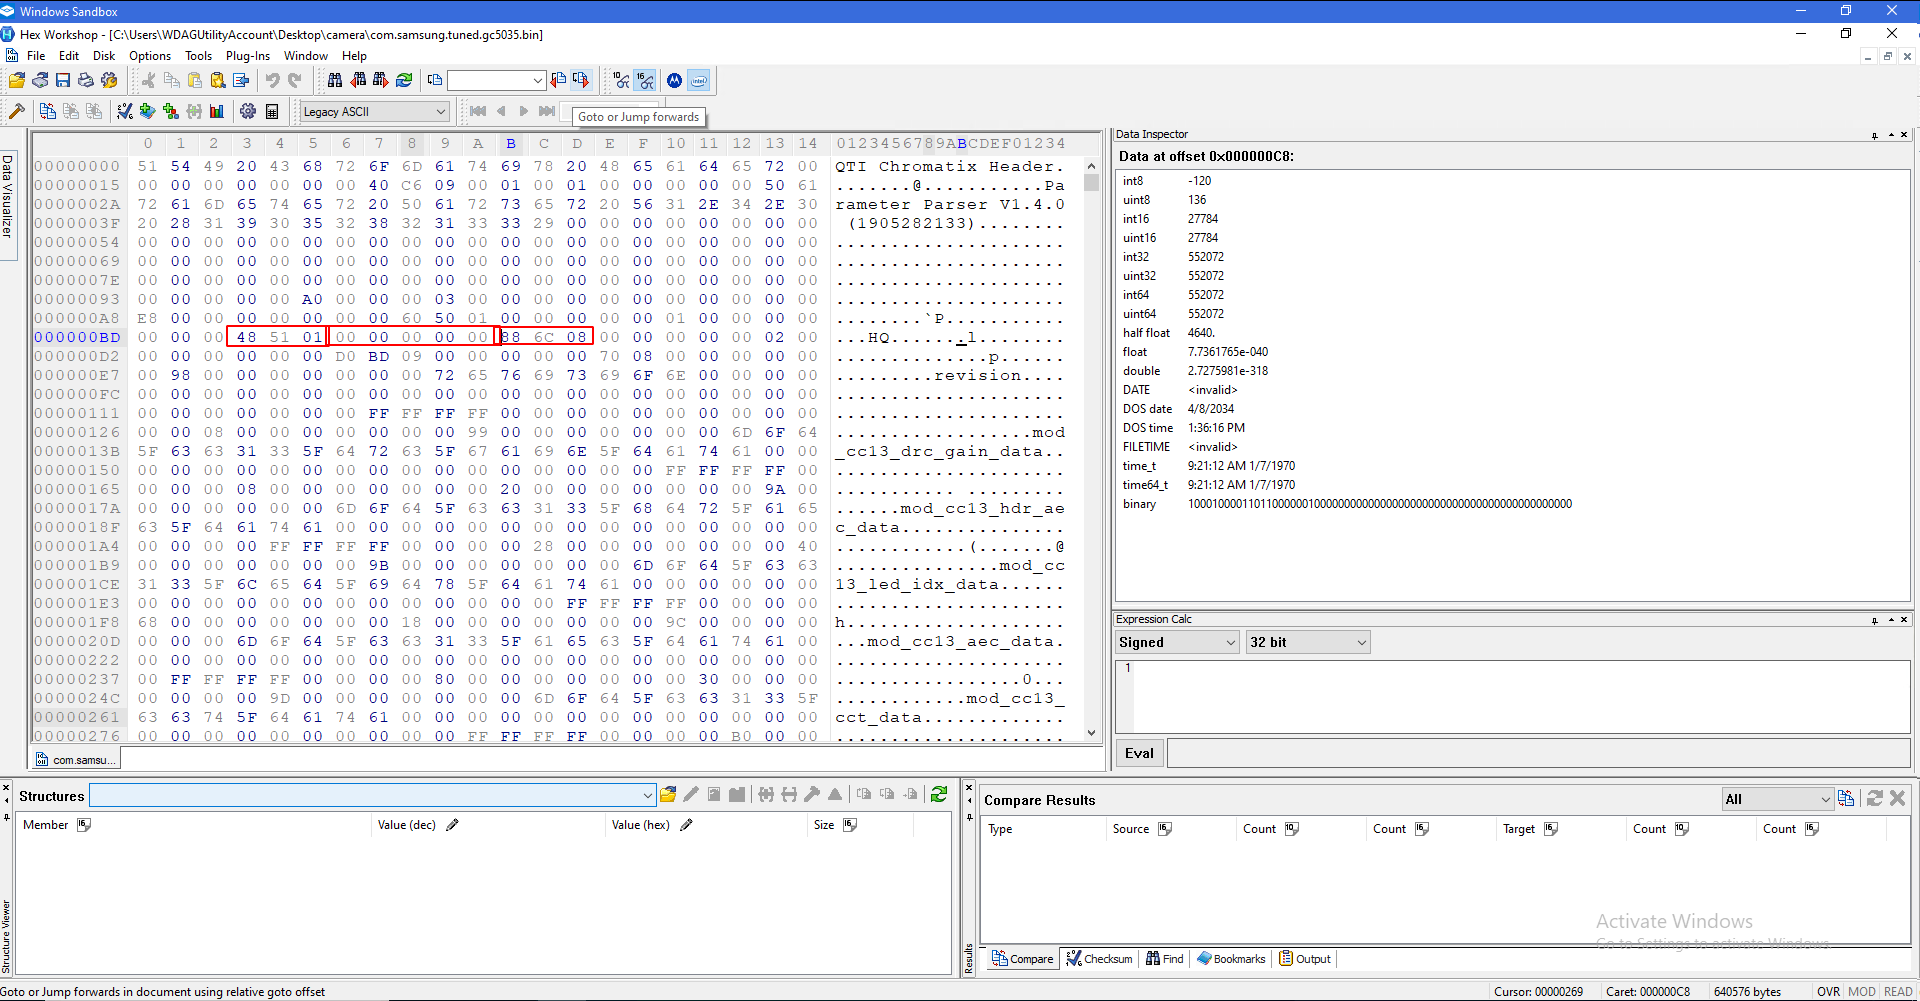
You want to select the first four pairs of that section, then copy the int32 on the right:
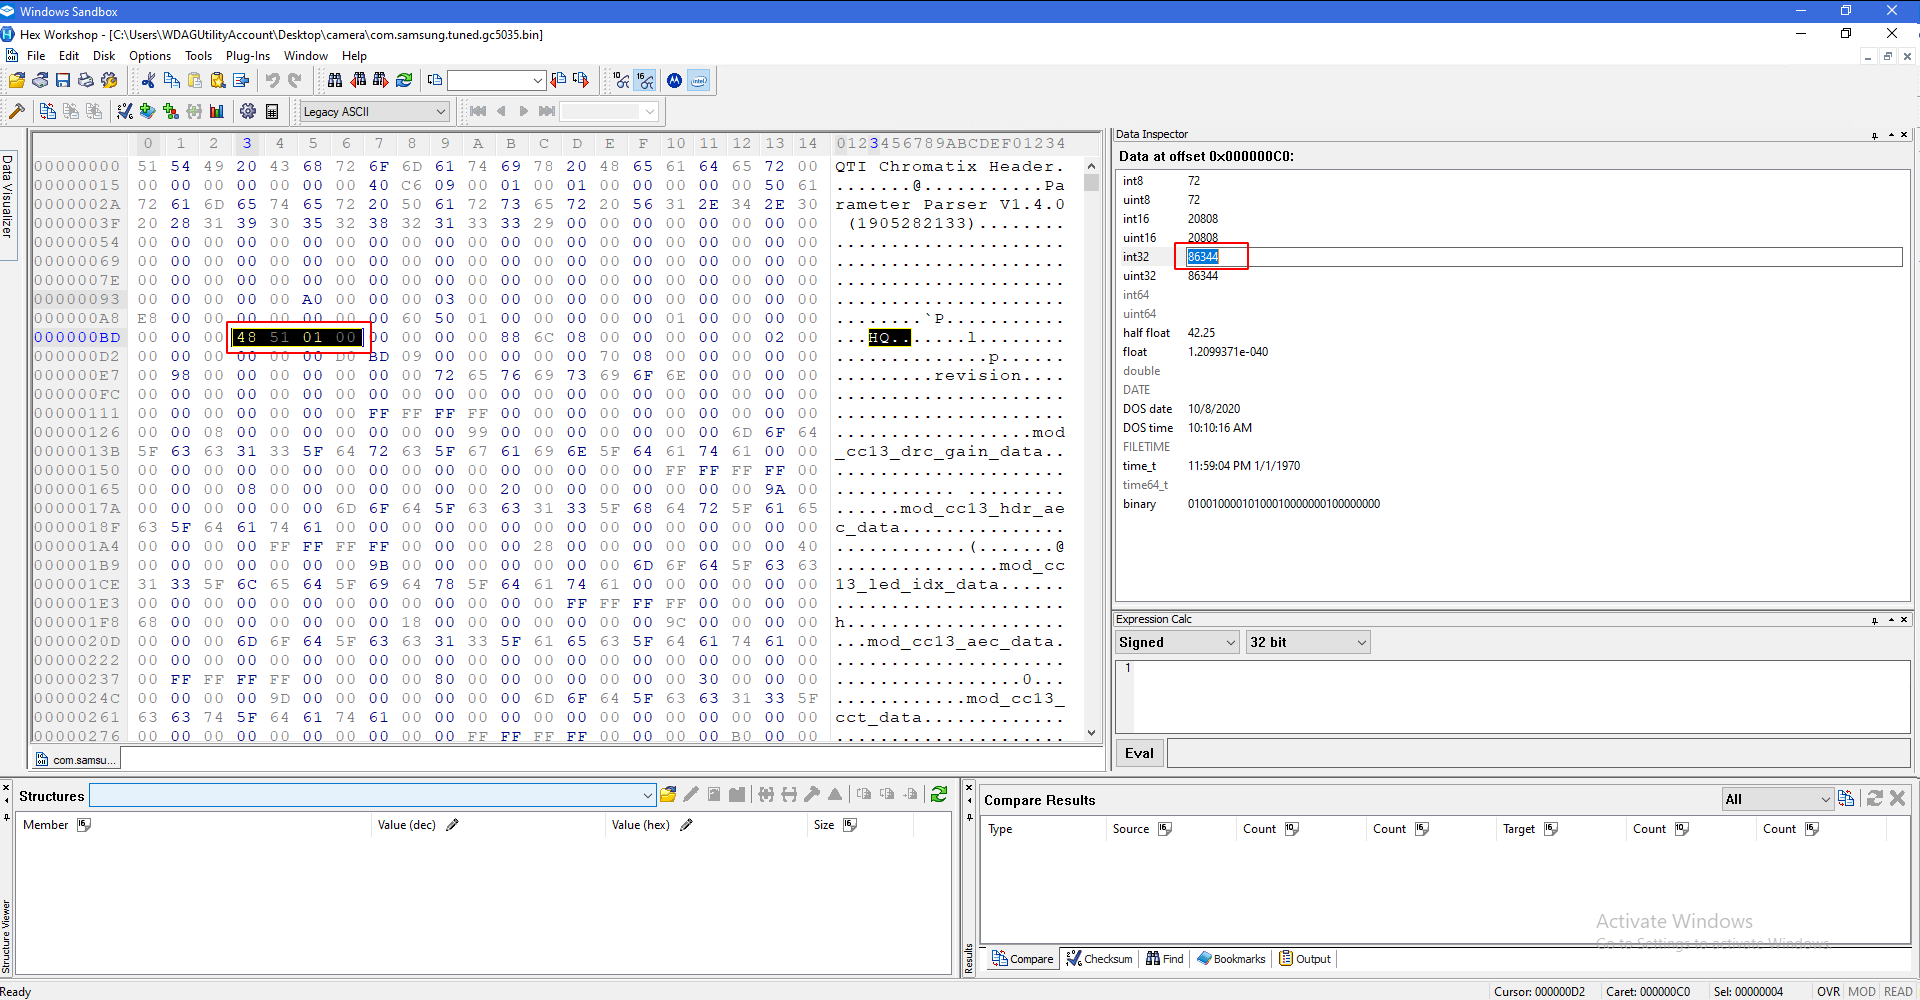
Paste that number on top in the box. Do not add + in front of it. Press enter, and you should see a pair highlighted.
Select that pair, and press ctrl + b to bookmark it. Name it as 'block start'. You should see a red square around it.
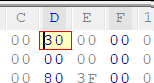
Press ctr + f and search for 'refptV1', making sure type is set to Text_String and the "Find all Instances"
There are probably going to be three results, you need the one which does not have any text preceding it (custrefpt1/flashrefptv1).
It should end in 31. Double check that you can only see 14 columns. Go two rows down from 31 and select four pairs:
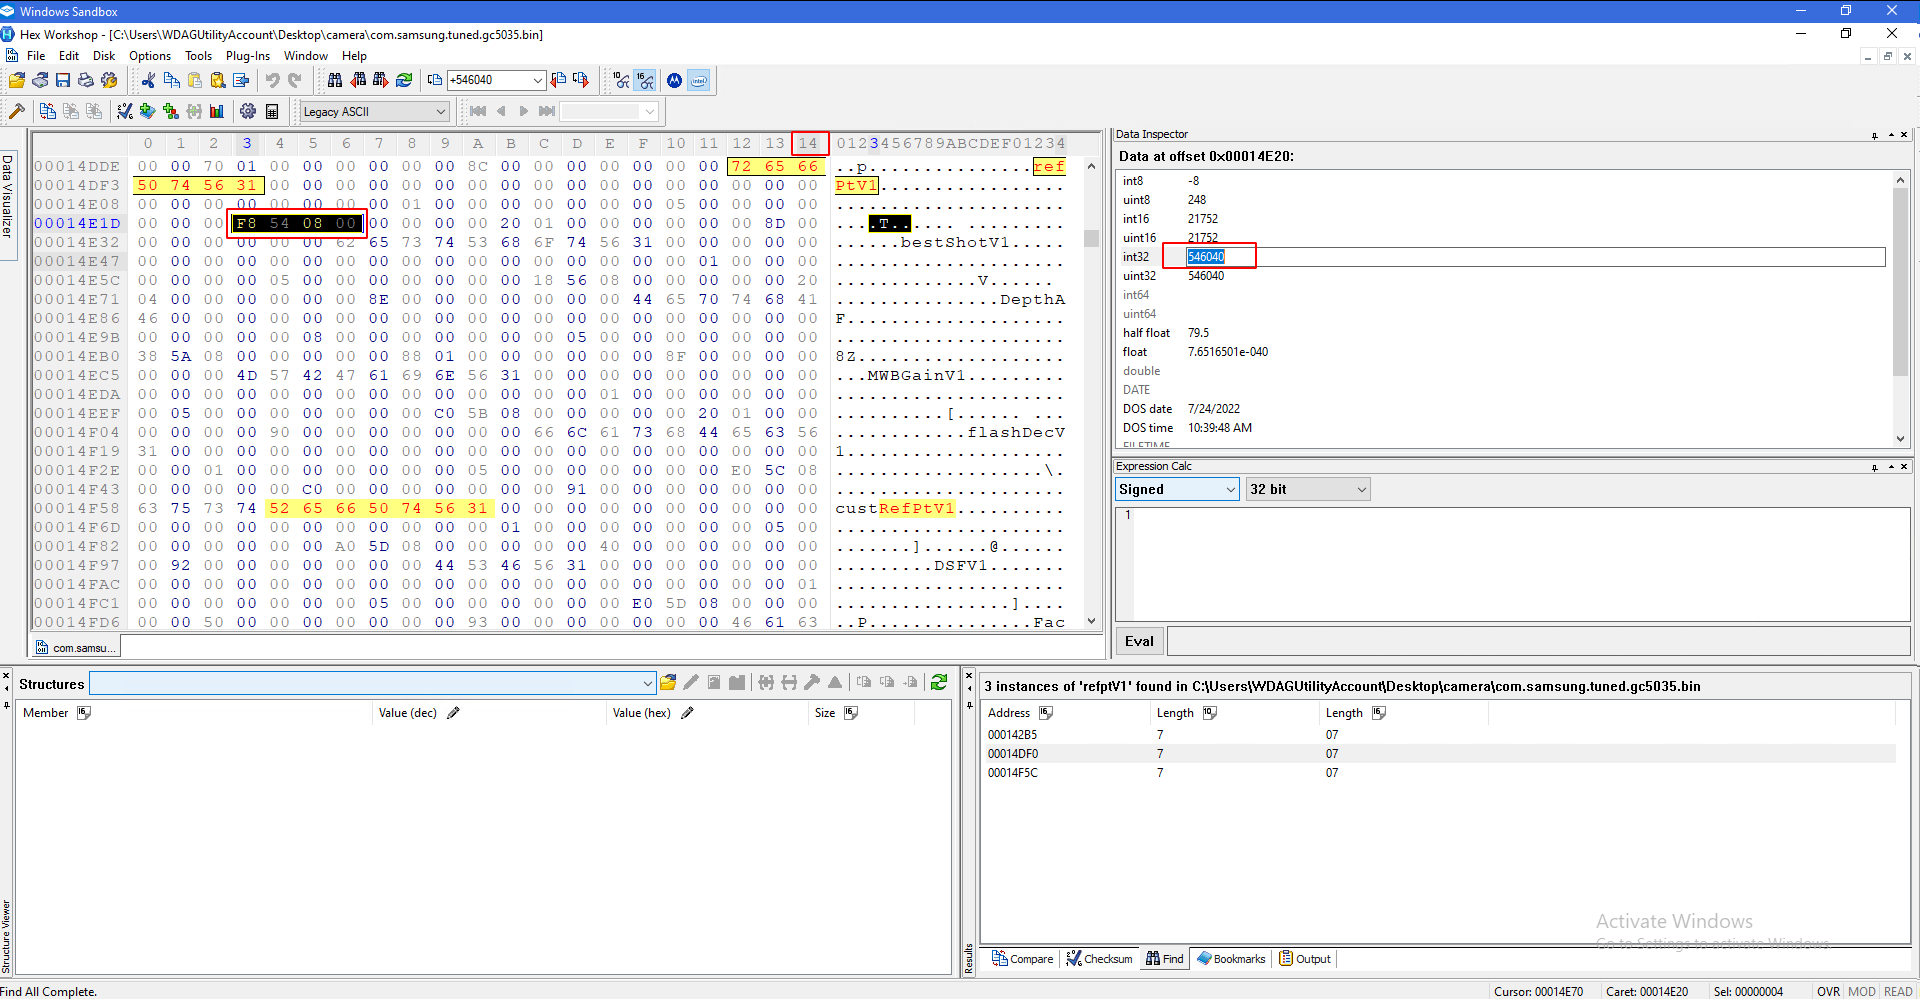
Go to the right hand side and copy the value shown in int32.
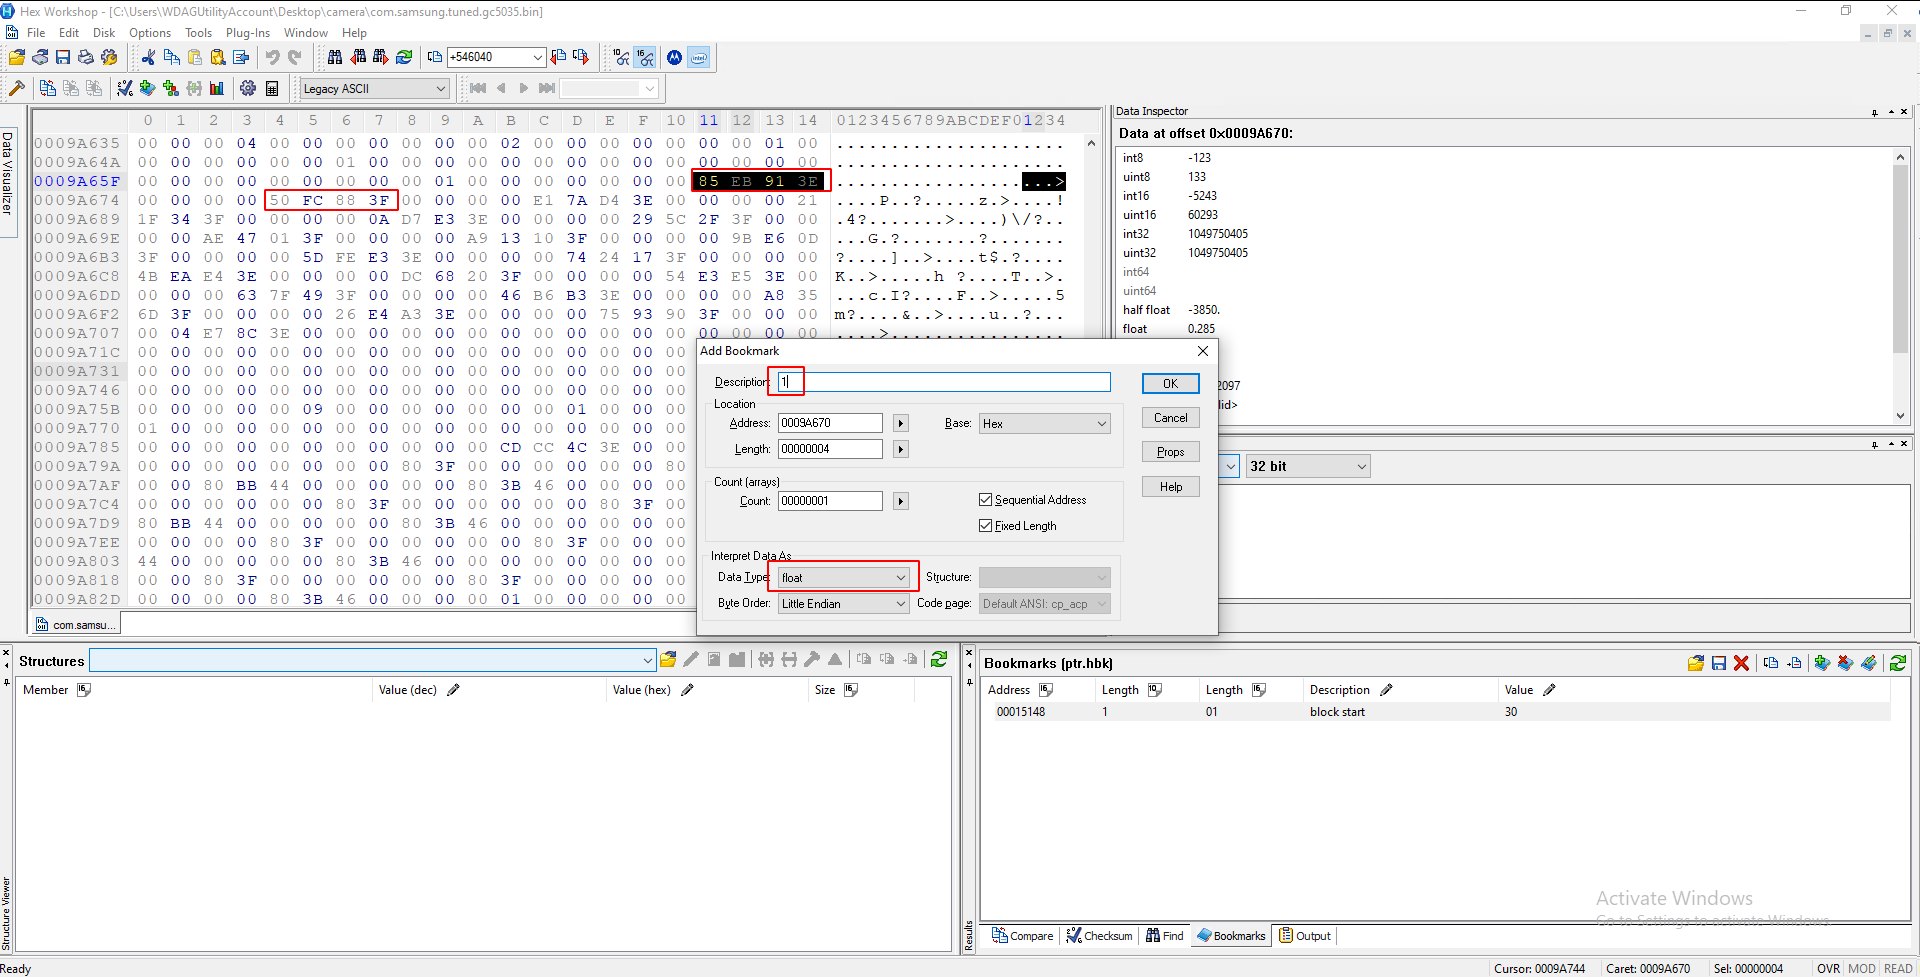
Now, click on the bookmarks tab in the bottom right corner, and click on the block start bookmark we made earlier. (You might have to deselect the four pairs to get this to work). Put this number WITH A + IN FRONT OF IT in the box on top and hit enter:
If this worked, you should see a bunch of four-paired chunks below the bit it jumped you to:
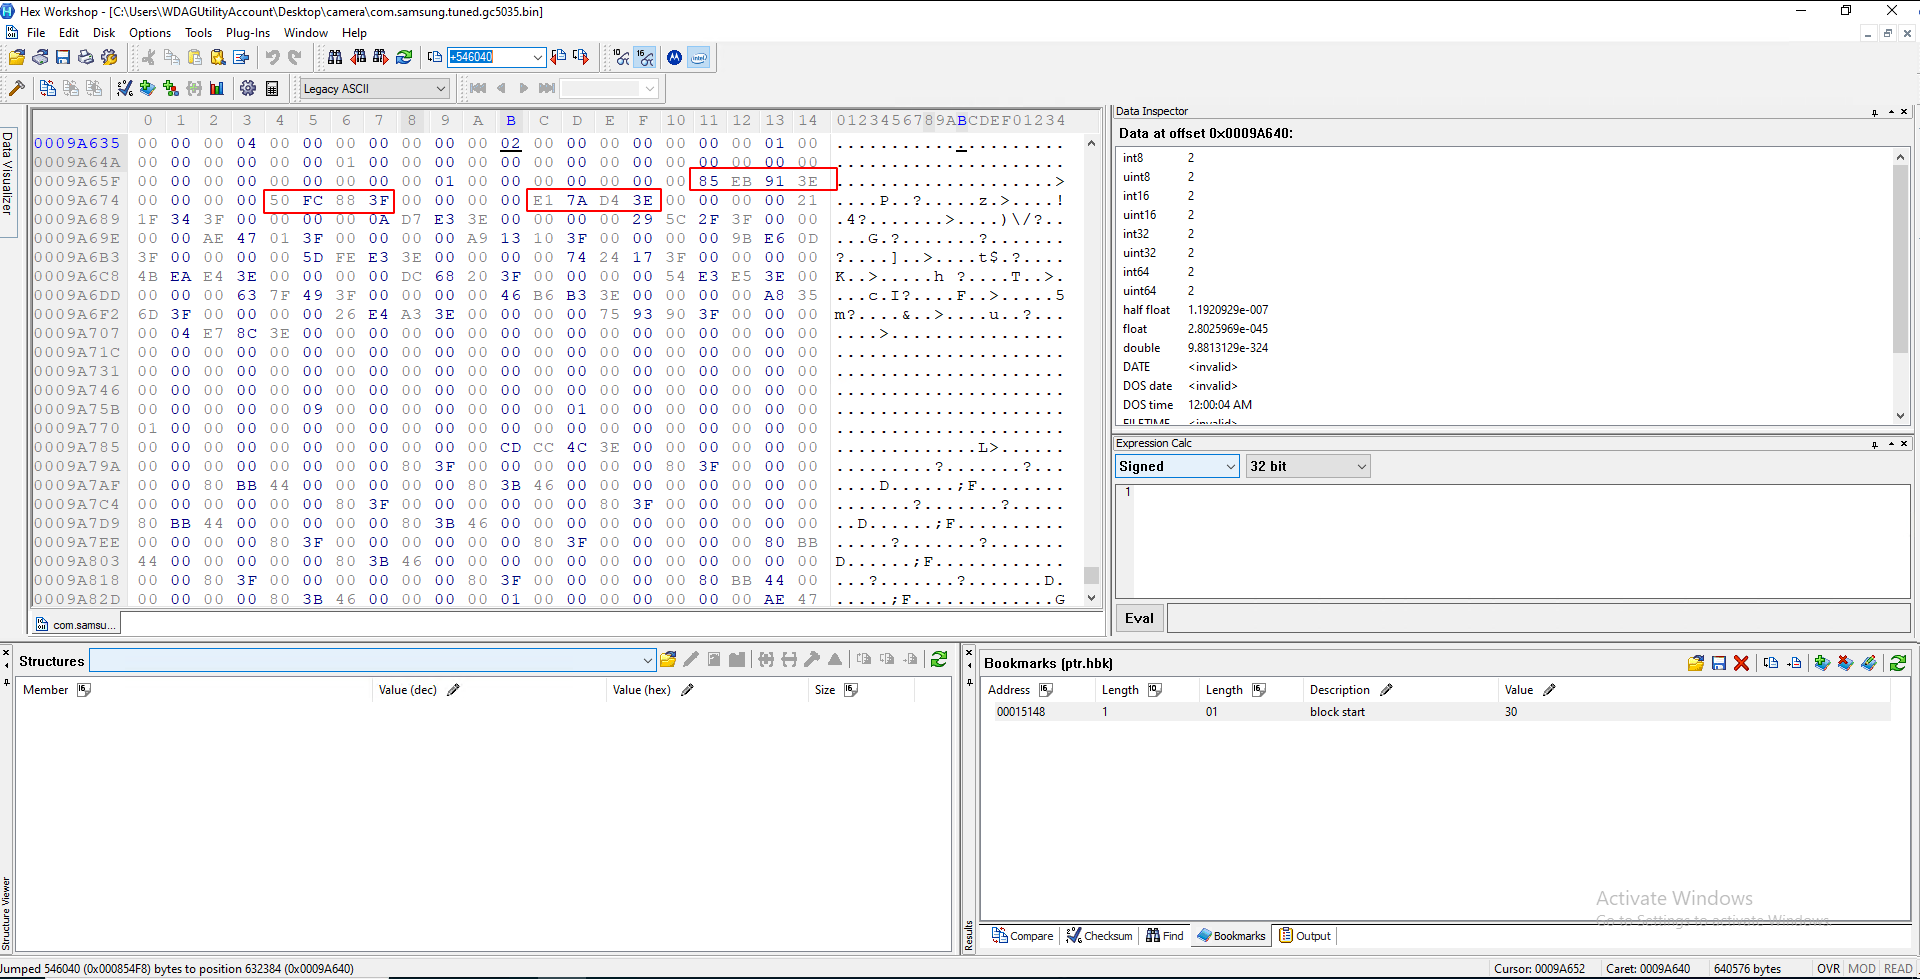
Congratulations, you found the right block!
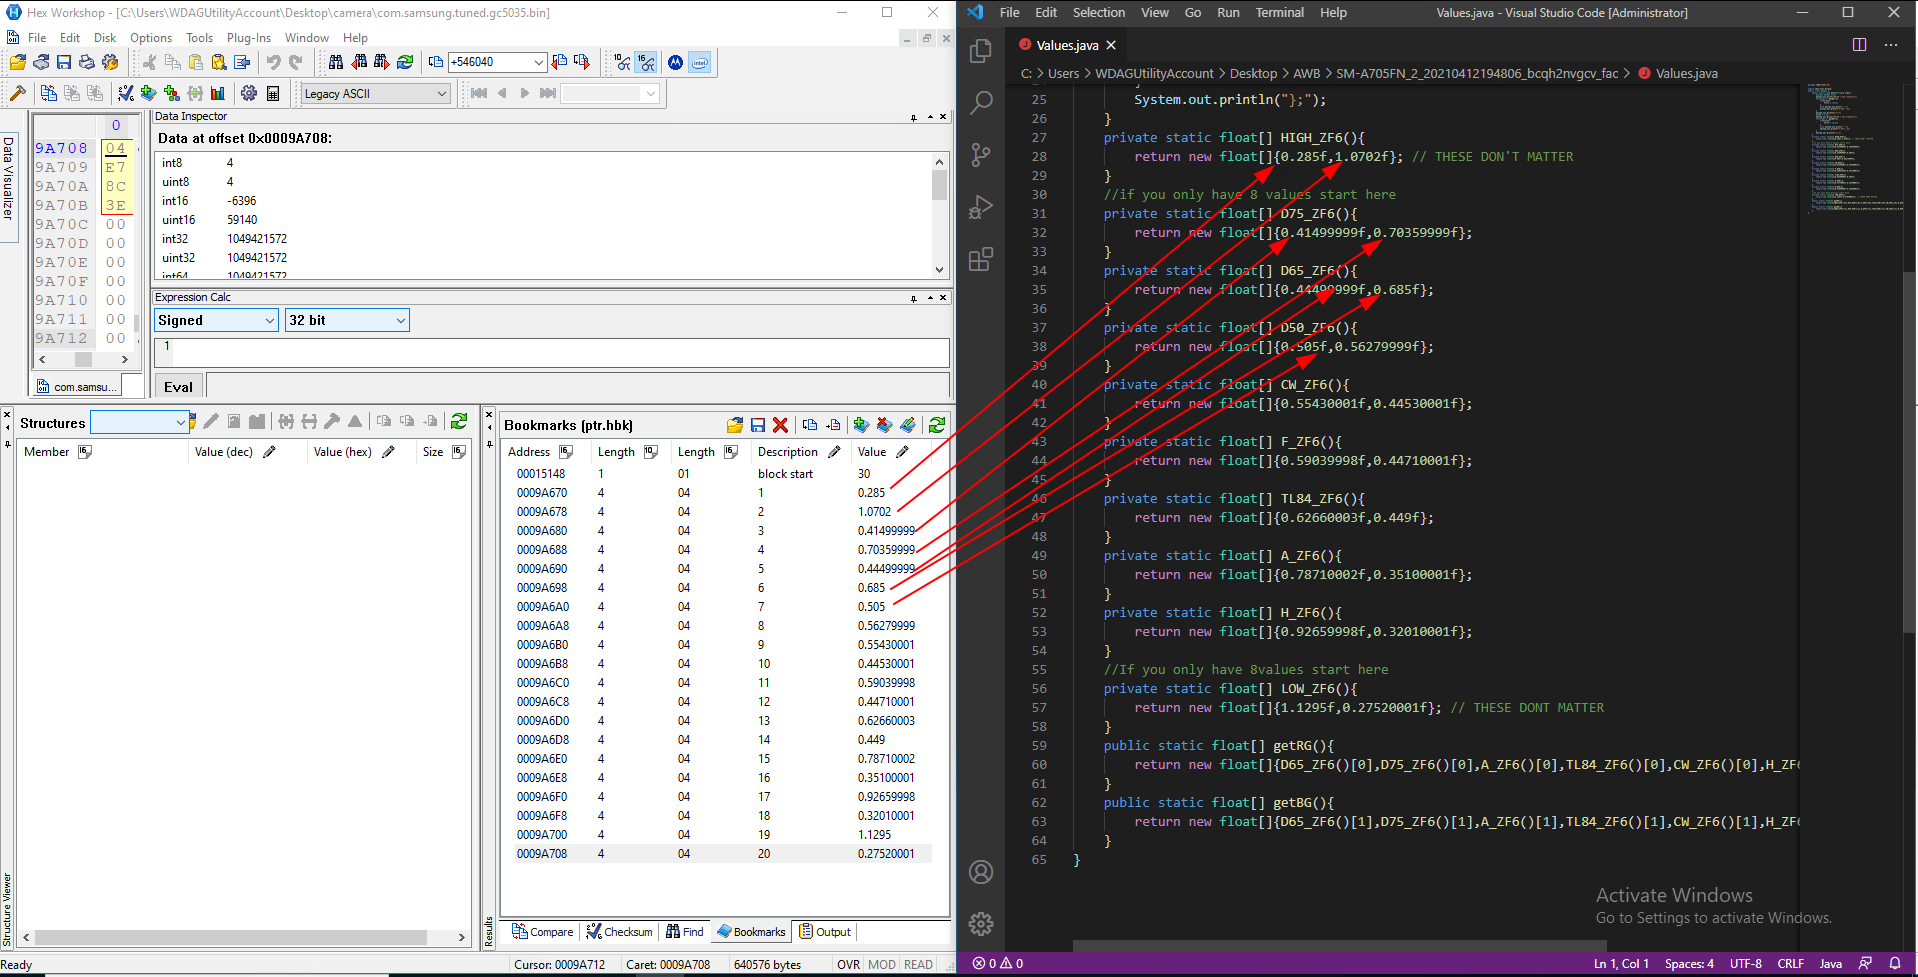
Part 4: Values
You should now select each of those four-pair chunks and press ctrl+b. Name them incrementally from 1-20 (there should only be 20), and always change the data type to "float":
When you are done, your bookmarks should look like this:
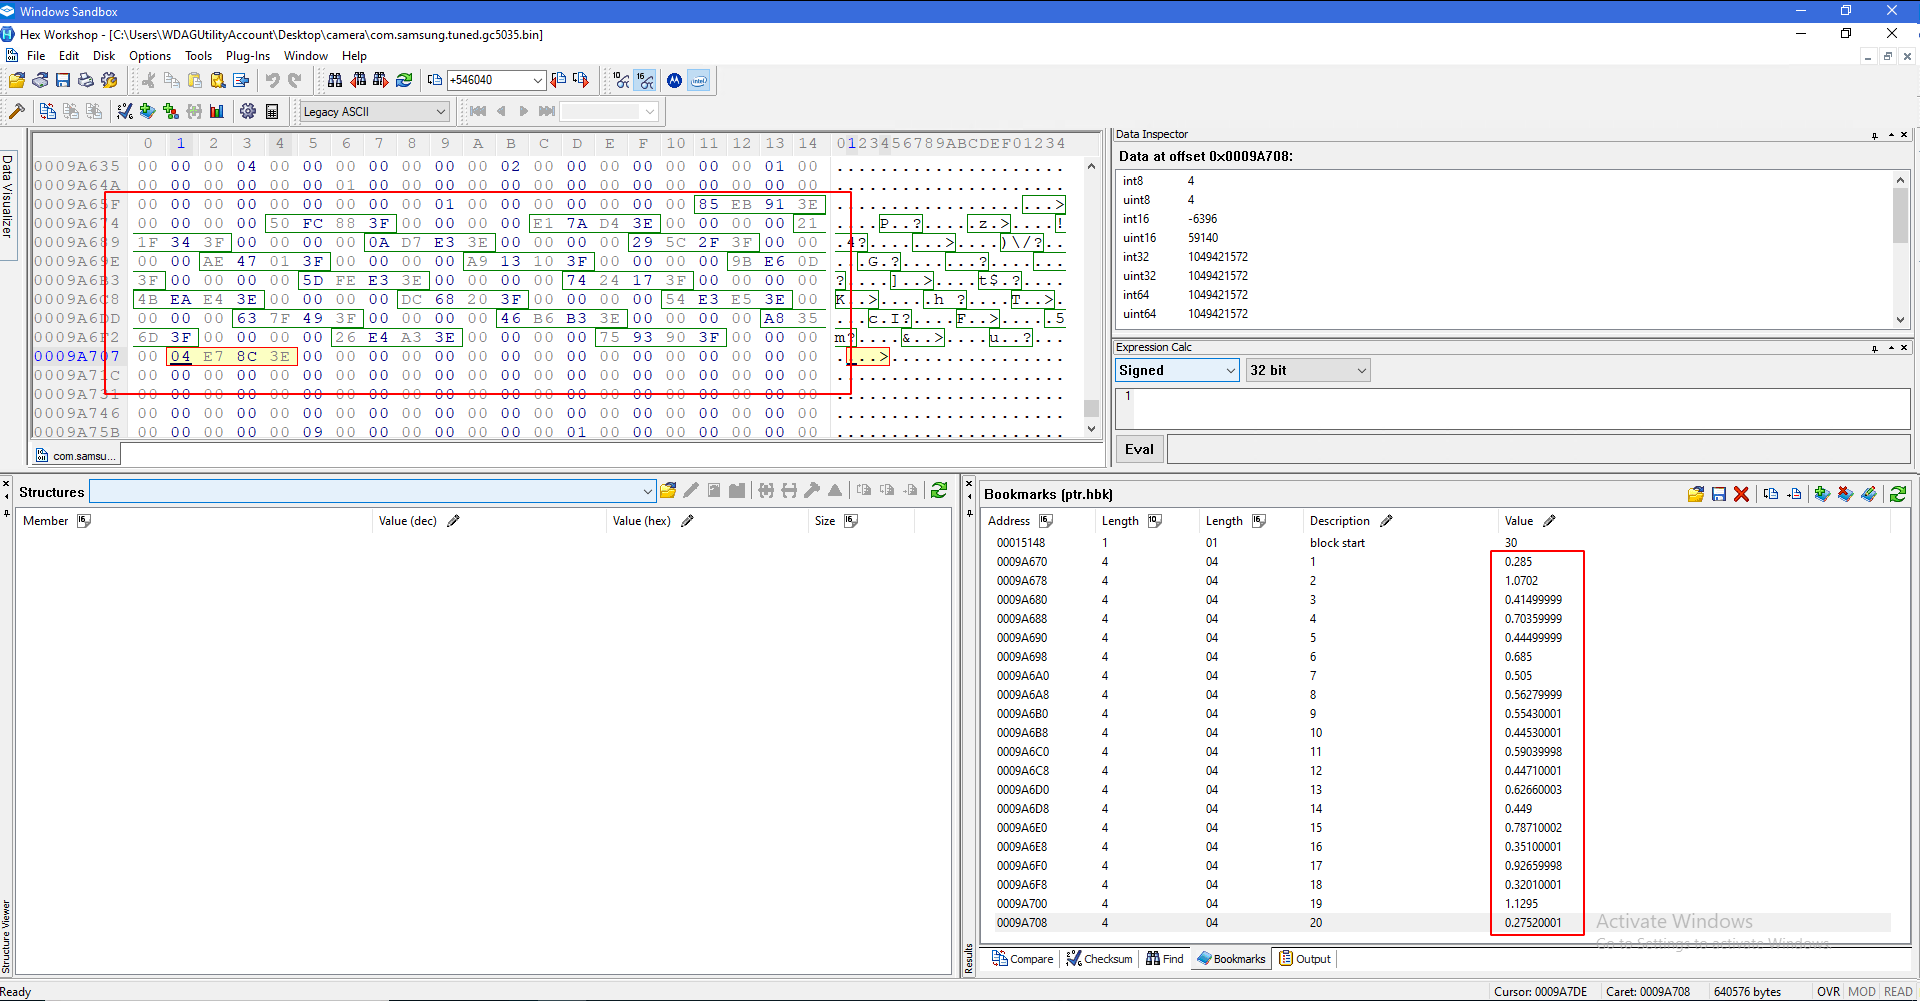
Notice how all the values in the editor screen have nothing but 0's between them, and how all of the bookmark values are from 0-2. It's possible this value could be out of this range, but unlikely.
You should now open the values.java file in your favorite text editor (I like vscode).
The values need to go in order into the java file as shown below.
When you are done, save the file, open a terminal window and run the java file *you need to be in the right directory, see the screenshot for how to change directories*.
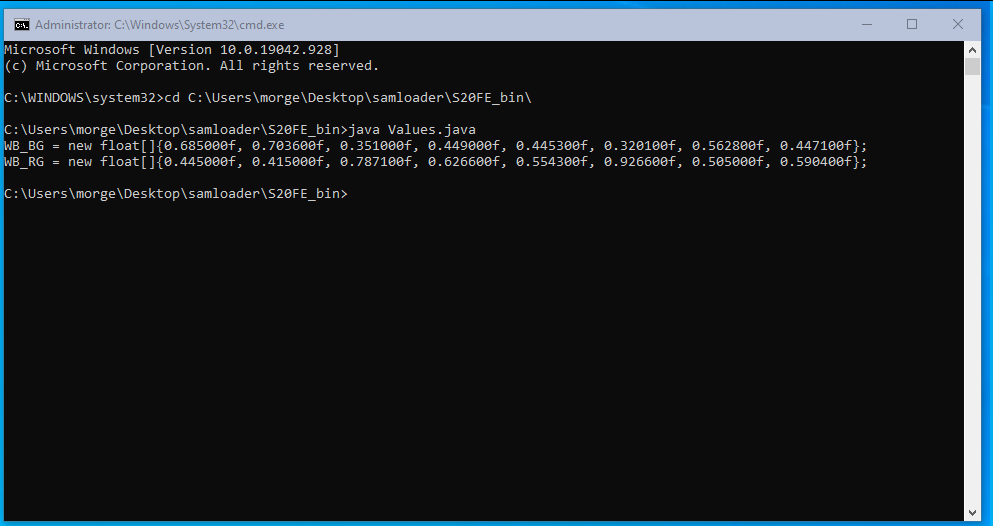
You should see an output like this. ^ If so, copy it and fill out the following form:
https://forms.gle/5kYM1RdEz7Qpvr8h9
Please make sure to pull the correct lens name (it's on the bin you just pulled from).
Congrats! You did it!